

The Aperture and F/stop
The aperture is the hole in the lens that lets light through. The f/stop (also written as f-stop) is the actual measurement of the hole. Since it can be adjusted or closed down to stop light from coming through, the different settings/measurements are called stops. The higher the f/stop number, the more light is restricted from entering the camera, and the lower number allows more light to enter the camera. (Higher number, smaller hole. Lower number, bigger hole.) There is no clear definition as to what the modern day f in f/stop stands for and the topic is debated among camera geeks. It may seem obvious at this point that in low light situations you may want to use a lower aperture, and in bright environments you use a higher aperture. Exposure is not the only thing the f/stop controls.
Depth of Field
The depth of field determines how much of the photo is in focus or appears in focus. A lens is only able to really focus on a single plane. Say, for example, you focus your camera on a point that is 5 feet away from you. That spot that you focus on will be the only object actually in focus. Everything in front of it and everything behind it will be slightly out of focus.
You can see an example of this without your camera. Close one eye and hold you hand in front of your face. Focus on your hand. You will notice that in your peripheral vision, everything in the background will be blurry or out of focus. Now switch to looking directly at something behind your hand. You will notice that your hand is now out of focus. This is because your eye is a lens just like the camera lenses and you can really only focus on one plane at a time.
The Camera’s Pupil
How then do you see vast beautiful scenery that all appears in focus? The short answer is your pupil. On a bright sunny day, your pupil is nice and tiny in order to restrict light from burning your vision. The smaller, more restrictive hole that light enters, the more precise those light waves must be to get through it. This results in a photo that appears sharper, more defined. The larger the hole is made, the more light is let in which creates out of focus foregrounds and backgrounds. As mentioned in the previous lesson, our brains take several photos and construct an image that is all in focus as our eyes dart around our environment. With a camera, you don’t get this advantage. But, that’s not necessarily a bad thing. We can creatively control what is in focus and what is blurred by changing the aperture.
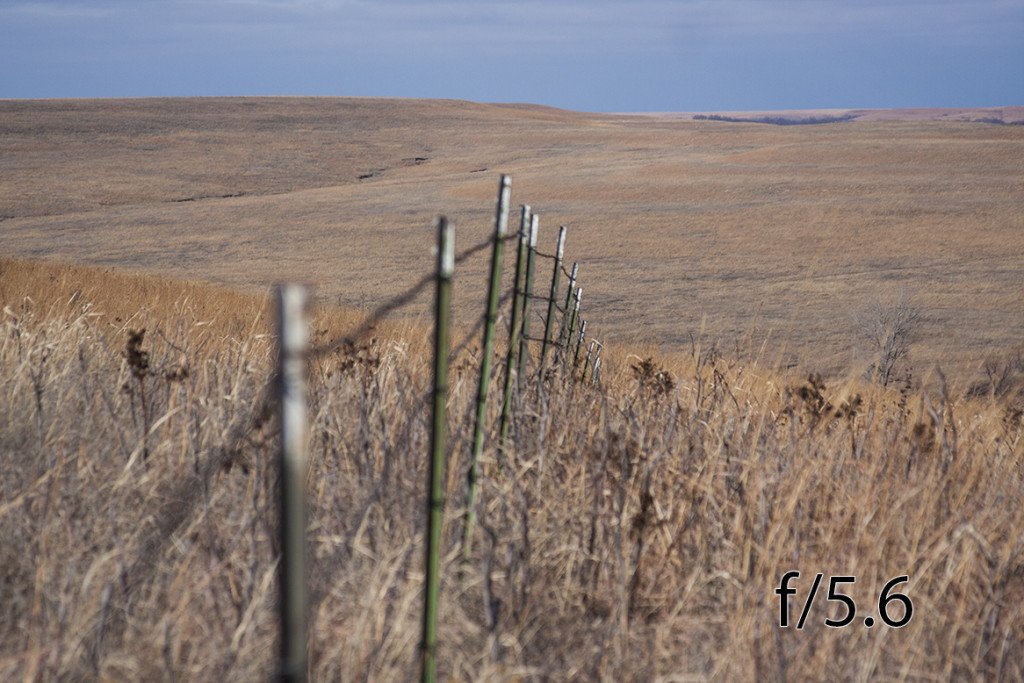
Why do I want Blur?
The answer to this question is dependent on your focal point. Choosing how much is in focus has an impact on the subject of your photo and and how it stands out. Let’s take the following three photos as examples.
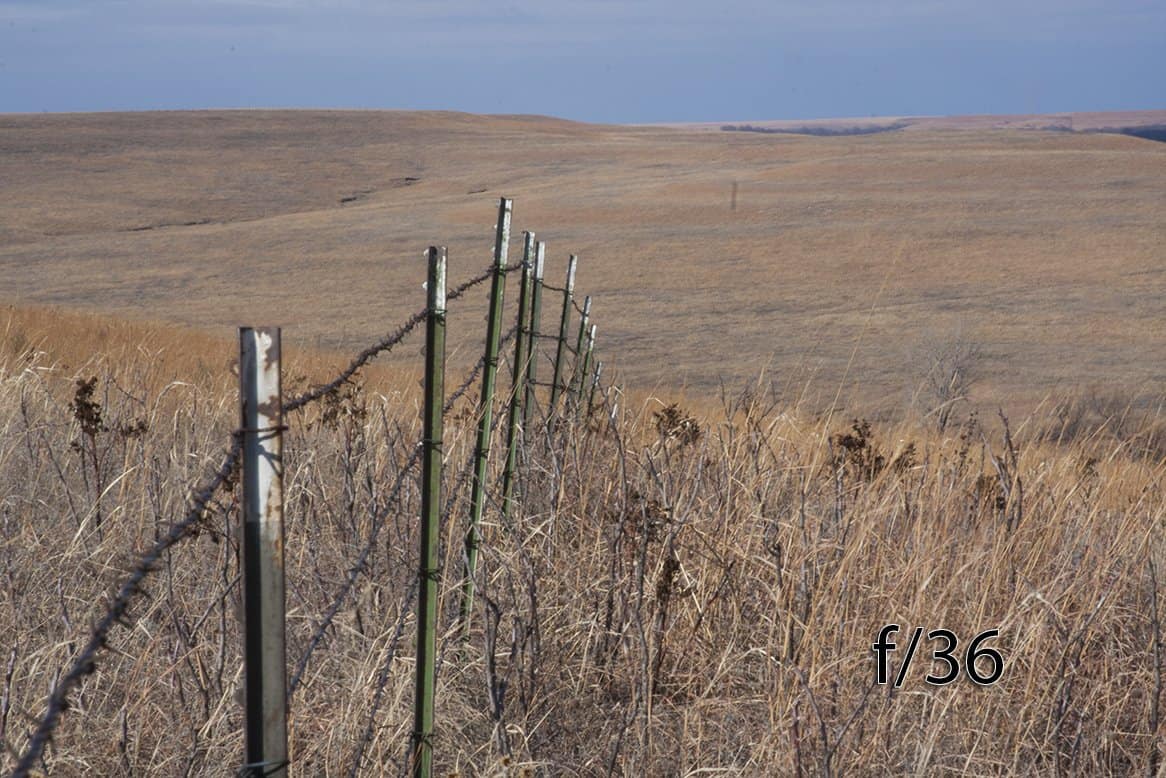
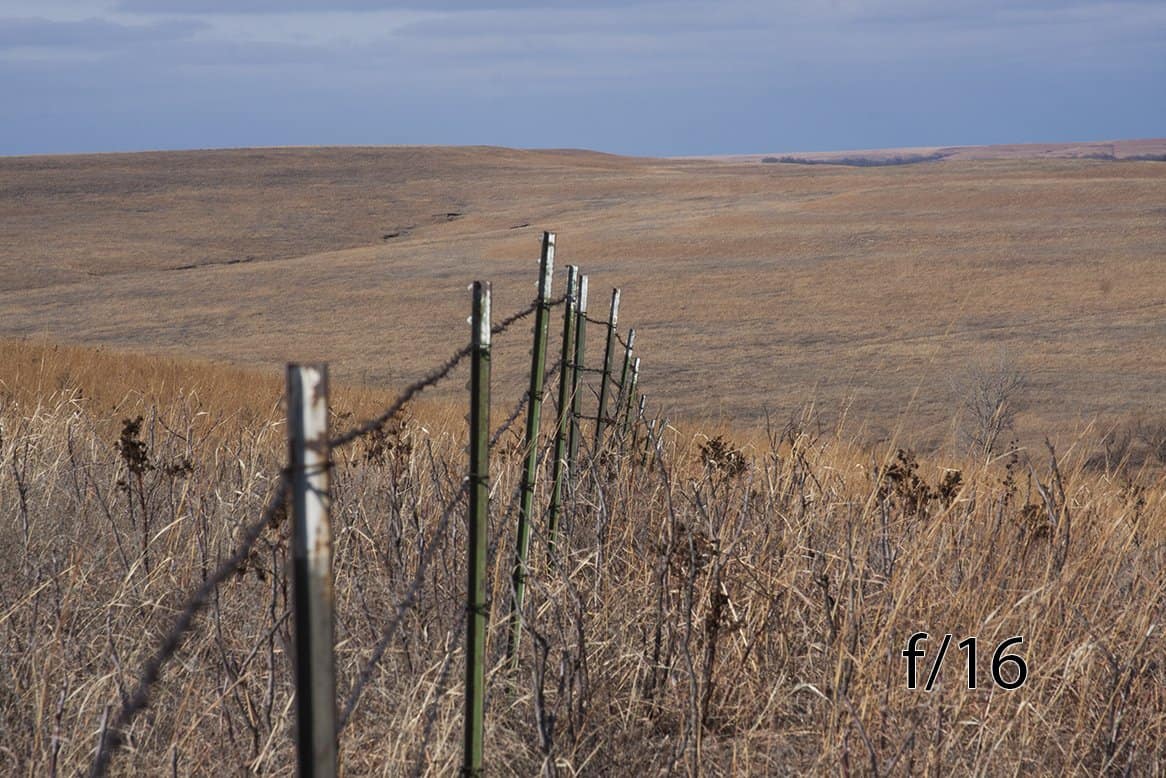

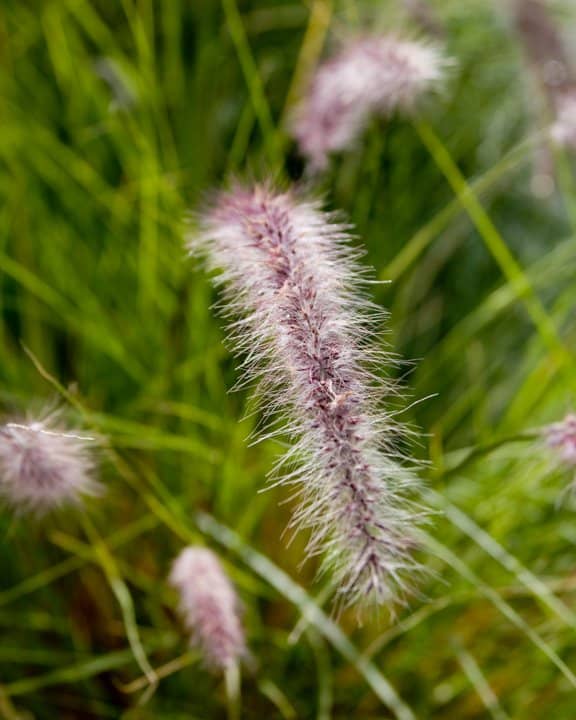
Obviously if you are taking a photo of a field of flowers, you want them all to be in focus. This requires a high f/stop. But if one flower captures your eye, you will want to make that one the focal point while the rest of the field is blurry. A low f/stop is called for in this instance.
What f/stop should I use?
In order to determine which f/stop to use, you must first decide why you want to take the photo. What is my photo about? Is it showcasing a landscape? Is there something in particular that you want to capture in your photo? In other words, what is the subject? There was something that triggered your arms to bring the camera up to your face.
Once you know the subject of your photo, you are ready to set the f/stop. Just remember, high f/stop equals deeper depth of field and low f/stop equals shallow depth of field. Knowing precisely how high or low to set the f/stop will come with practice. It is a good idea to take several shots of the same subject using different f/stops and choose your favorite.
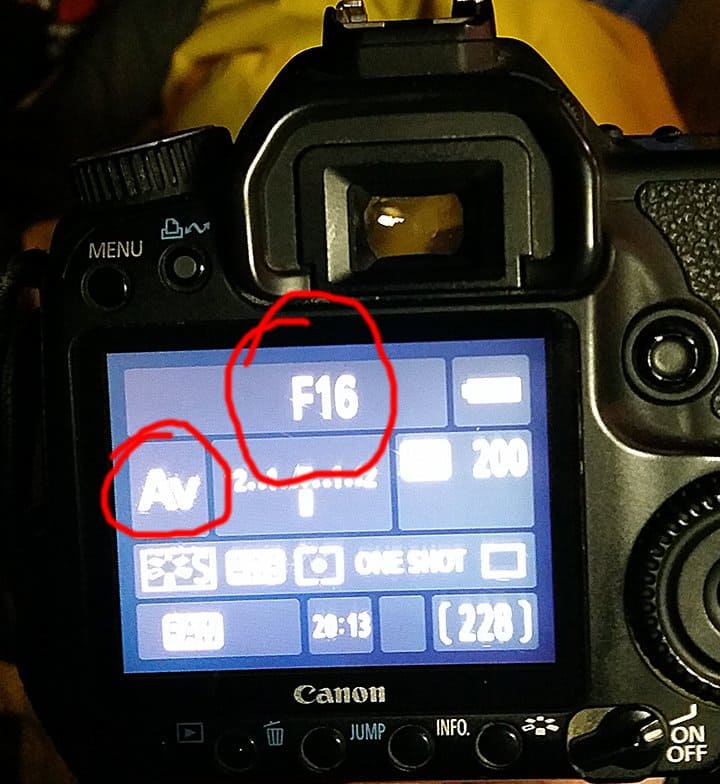
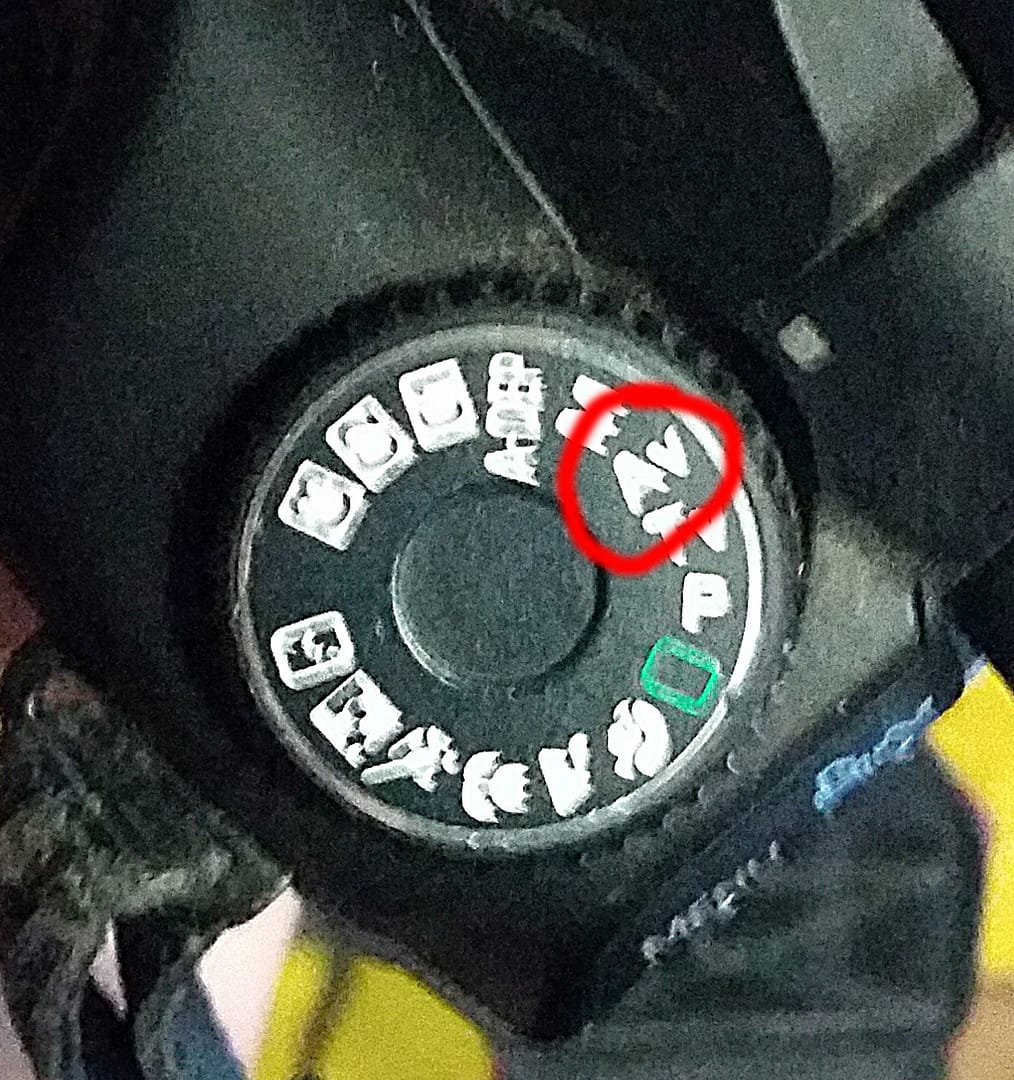
Aperture Priority Mode
If you can adjust the f/stop manually on your camera, it most likely will have a setting that simply says A or Av which stands for aperture value. This setting will allow you to set the f/stop and then it will automatically select a shutter speed to get a correct exposure. This mode is great because you have only one setting to think about, the depth of field. Consult your manual since each camera is a little different. If you are having trouble finding out how to switch to this shooting mode, you can contact me by commenting on this post or by using the Contact Us page on our site.
Homework
It is time to play with your f/stop. Switch your camera to A or Av mode and experiment with the depth of field. This works best if you have a subject like a person or object you are wanting to photograph. Take a photo with a high f/stop, then with a low one. Notice the differences in your depth of field.
Remember, before taking a photo, try to think about why you are taking the photo. What is a the subject? Does the background matter or will it compete with the focus of your photo? Answering these questions will help you decide how much the foreground and background should be in focus.
Be sure to have your flash off when you do this experiment. I will discuss flashes in a later lesson. I would spend a day just shooting and changing your aperture to see how this effects your shots.
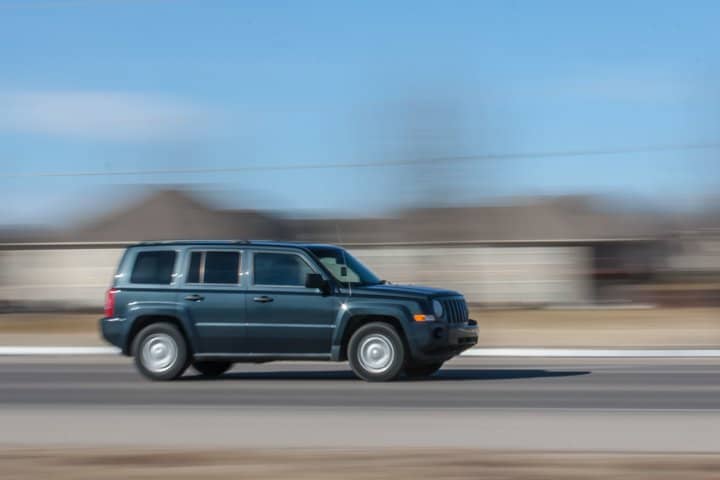
Next Lesson
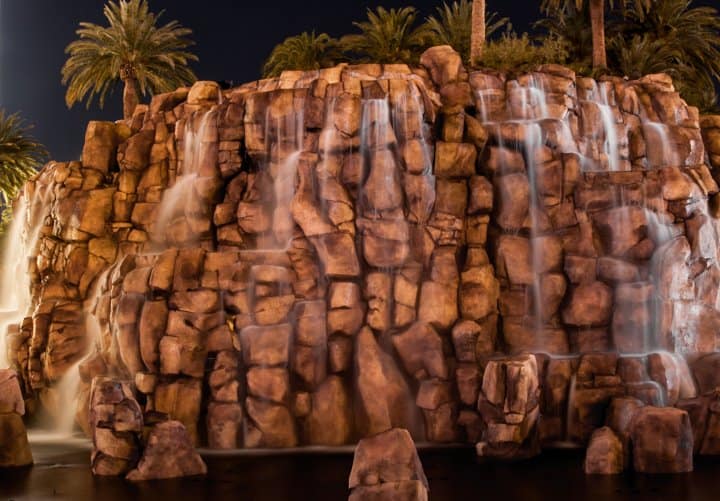
In Lesson 3, I will discuss shutter speed and show you how to get photos like the ones below. In Lesson 3, I will discuss shutter speed and show you how to get photos like the ones below. As a note, many of the more advanced effects I will discuss require a very steady hand or better yet a tripod. You can get a very decently priced tripod that is lightweight by clicking the Shop now button of our associates link here.

Other Lessons
